Subscribe to our ▶️ YouTube channel 🔴 for the latest videos, updates, and tips.
Measuring the Line Segment
We will discuss here about measuring the line segment.
A line segment is measured by comparing it with a standard line segment and is known as the unit segment.
The number of times a unit segment is contained in the given line segment is known as its length.
How to Draw and Measure a Line Segment using Scale or Ruler?
We can measure a line segment by two ways.
(i) With the help of scale or ruler only.
(ii) With the help of a pair of dividers and a scale or ruler.
I. Measuring a line segment with the help of a scale:
Generally, we measure a line segment with the help of a scale which has marking in centimetres (cm) and inches (in). Mostly we measure the line segments in centimetres. Each centimetre is divided into 10 small equal parts, called millimetres (mm).
1 cm. = 10 mm. and 1 mm. = \(\frac{1}{10}\) cm.
A line segment has a beginning and an end. The line segment is a part of a line. It has two end points denoted by A and B.
Let us learn how to measure a line segment. We use a scale to measure the line segments. Centimeters and inches are marked along the two edges of the scale.
Let us learn to measure the length of a line segment AB in centimeters.
Marks on the ruler are on the same level as on the line segment AB (say).
For measuring the length of a line segment AB, we place in
such a way that the end point A of the line segment coincides with 0 mark of
the scale.
We hold the scale properly along the line segment. We read the mark on the scale that coincides with the end point B. Here, we see that the 7th centimetre mark on the scale that coincides with the end point B. Here, we see that the 7th centimetre mark coincides with the end point B. Thus, the length of the line segment AB is 7 cm.
We should take some precautions while measuring a line segment. Sometimes, because of broken corner 0 mark of the scale does not appear. If it is so, we can place any other point centimetre mark of the scale on the end point A and measure the line segment AB by counting from that centimetre mark.
Step I: Place the edge of scale on the line AB such that its '0' mark is at point 'A'.
Step II: Read the scale at the point 'B'. Here the mark on the scale is at 8 cm.
AB is a line segment. So, the length of line segment AB is 7 cm.
Working Rules to Measure the Length of a given Line Segment \(\overline{MN}\):
Step I: Place the scale or ruler (which has centimetre marks on one edge and inch marks on the other edge) with its edge along MN such that the zero mark of the scale coincides with point M.
Step II: Read the mark on the scale against point N, which is the required measurement of \(\overline{MN}\) in cm. (In the figure, it is read as 4 cm).
Measuring Line Segments:
We measure the length of a line segment with the help of a ruler. To measure the length of a line segment AB shown below, put the scale along the line segment in such a way that one of its edges touches both the points A and B and the O mark of the scale at A. Now, read the scale at mark B. The reading of the scale at mark B gives the Length of the line segment AB in centimetres.
Here, the length of line segment AB is 10 cm.
II. Measuring a line segment with the help of a divider and a scale:
We can use a divider along with a scale to measure a line segment.
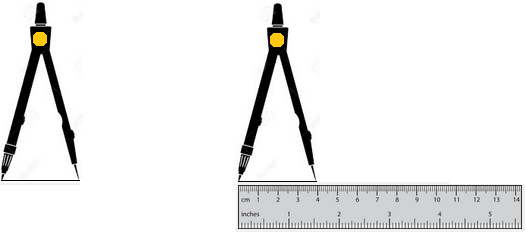
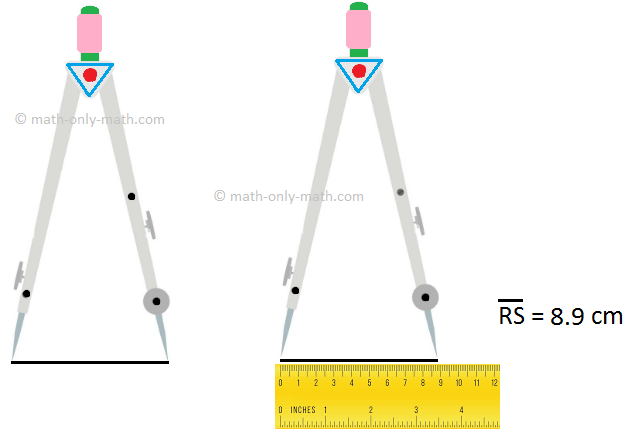
We open the pair of divider carefully and place the pointed ends of the pair of divider on the both ends of the line segment as shown here. We lift divider very carefully without disturbing its arms.
Now we place its one end on the zero mark of the scale and let its other end rest at a certain mark of the scale as shown here.
Finally, then we read the length.
A divider has two arms with sharp pointed ends. The distance between the end points can be increased or decreased.
Place the divider on the line segment RS such that one of its sharp end is on ‘R’ and the other sharp end is on ‘S’.
Remove the divider and place it on the scale and measure the distance.
III. Comparing Line Segments:
Line segments can be compared using a ruler as well as a divider.
(i) Using a Ruler:
Measure the line segments and find which is longer or shorter.
(ii) Using a Divider:
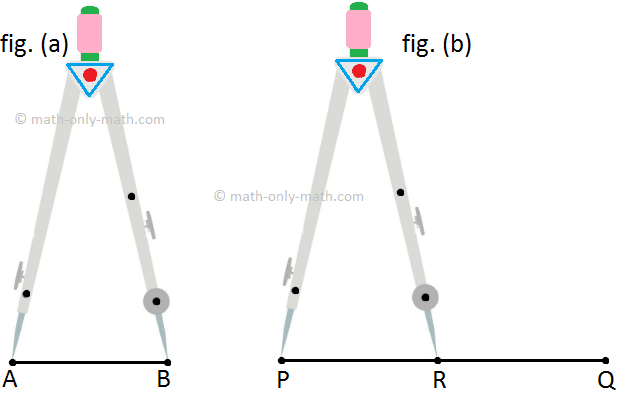
Compare the line segments AB and PQ.
Place the end points of the divider on the end points A and B of AB as shown in fig. (a)
Lift the divider without disturbing its arms. Place the end point of one arm at P and see where the end point of the other arm falls. (as shown in fig (b)
Let it fall at R.
If ‘Q’ is ahead of R \(\overline{AB}\) is shorter than PQ
If ‘R’ is ahead of Q \(\overline{AB}\) is longer than PQ
If ‘Q’ and R coincide \(\overline{AB}\) and PQ are of same length.
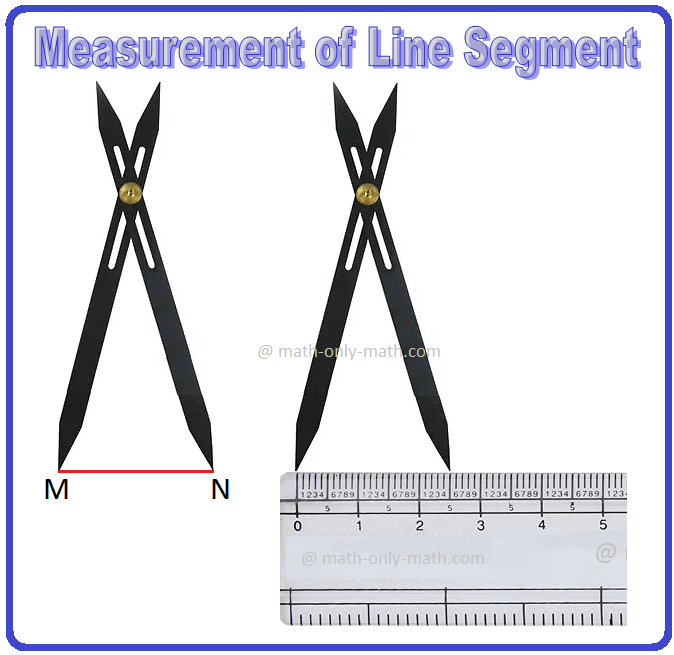
Working Rules to Measure the Length of \(\overline{MN}\) when marks on the Ruler are not on the Same level as of the Line Segment \(\overline{NM}\).
To measure the length of \(\overline{MN}\).
Step I: Open the end points of the arms of the divider such that they coincide with M and N respectively.
Step II: Then, without disturbing the scale, place the divider such that the end point of one arm is at zero.
Step III: Now, read the mark against the end-point of the second arm, which is the required measurement of \(\overline{MN}\) in cm.
Here, the length of the line segment \(\overline{MN}\) shown in 5 cm.
Worksheet on Measuring the Line Segment
Questions and Answers on Measuring the Line Segment:
1. Measure the following line segments.
2. Measure all line segments in the following figures.
From Measuring the Line Segment to HOME PAGE
Didn't find what you were looking for? Or want to know more information about Math Only Math. Use this Google Search to find what you need.




New! Comments
Have your say about what you just read! Leave me a comment in the box below. Ask a Question or Answer a Question.